Introduction
In this article we will talk about a static analysis tool, called NDepend, that offers a wide range of features to let the user analyze a code base, that is often described as a Swiss Army Knife for .NET developers :).
For those that don't know, the definition for Static program analysis from wikipedia is "the analysis of computer software that is performed without actually executing programs (analysis performed on executing programs is known as dynamic analysis). In most cases the analysis is performed on some version of the source code, and in the other cases, some form of the object code".
Installation
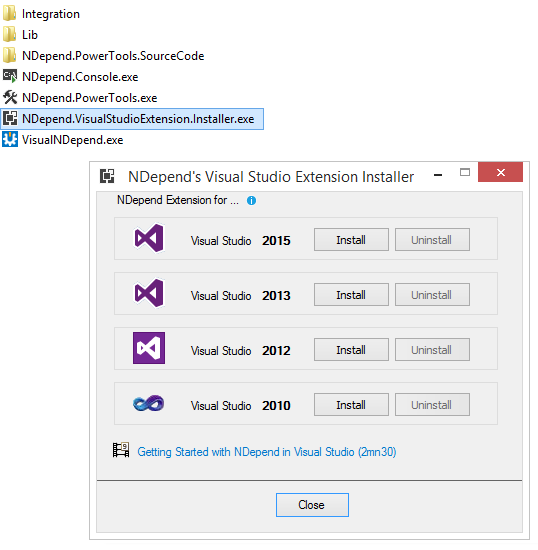
In order to use NDepend in Visual Studio, you need to download NDepend installtion zip file, from here http://www.ndepend.com/download. You can use the product, with all functionalities included, free, for 14 days. After downloading the zip file, you need to start NDepend.VisualStudioExtension.Installer.exe and choose Visual Studio versions for which you want to have NDepend.
Open Visual Studio. You will notice a new menu: NDepend.

Analyze a Visual Studio Solution
After the add-in is installed, you have to open the Visual Studio solution that contains the code that you want to analyze. You can start analyzing the code either from menu NDepend > Attach new NDepend project to current Visual Studio solution or from the circle status icon that can be found on the bottom right of the Visual Studio window.

The dialog that will be opened will be include all .NET assemblies of the Visual Studio solution. In this dialog you have the possibility to add more .NET assemblies compiled from another solutions.

Clicking on Analyze .NET Assemblies, will generate very fast, in a few seconds, a report with the analysis of the code source.
Analyze .NET Applications
Besides NDepend.VisualStudioExtension.Installer.exe add-in, we can analyze .NET applications with VisualNDepend.exe that you'll find it in the downloaded zip file. With this you can analyze VS solutions and projects, analyze .NET assemblies or a set of .NET assemblies.

NDepend Report
After you start analyze the code, a report in format HTML will be generated. Also, in Visual Studio, you be asked to see the Dashboard, show graphs, browse code rules.

NDepend Dashboard looks like this:

NDepend Report looks like this:

What does NDepend report tells about the code?
- Application Metric: What is the topology of your application?
- Assembly Metric: What is the size of each assembly within your application in terms of #IL instructions and others metrics?
- VisualNDepend View: What are the sizes of your assemblies, namespaces, types and methods in terms of #IL instructions?
- Assembly Abstracness vs. Instability: What is Abstracness/Instability principle explained in the assemblies metrics section?
- Assembly Dependencies: What are the dependencies between assemblies in your application?
- NDepend information and warnings: How should we organize your code:?
- CQLinq Queries and Rules: What are the default CQLinq rules which have been violated?
Below, you can see some diagrams for a testing project that is using Page Object principles in order to perform GUI testing with selenium web driver and applitools.


NDepend Features - Rules
Go to http://www.ndepend.com/features/ in order to discover all NDepend features. Below we will talk only about code rule and code query over LINQ, which, thanks to CQLink allows us to query the code in order to identify potential problems.
There are around 200 default queries and rules that you can use to analyze the code, but you can define your own rules and queries. CQLinq editor is very easy to use and it supports code completion, includes documentation, compile error description.

After the query is compiled, it will automatically be executed and the results will be shown and will be browsable.

Below you can see some rules and queries examples, taken from NDepend site.


Conclusions
NDepend is a great static analysis tool, very well documented, easy to use, giving you insights into the health of your code.
Happy testing and... make it green, becomes a dream :).


