Introduction
In this article we will write about some utils methods that are useful in your selenium webdriver framework
- Visual Studio 2013
- Selenium WebDriver with C#
- Nunit to run the tests
- An existing page object framework
Utils class
In our framework we created Utils.class that contains different methods used in nunit tests in order to work with mouse events, selection control, string manipulation, etc.
Mouse Events
If you cannot perform wevdriver mouse events by using the usual way, with action class, replace this with
If you cannot perform wevdriver mouse events by using the usual way, with action class, replace this with
javascript.


... and with Action class

Work with Alerts, Windows, Frames
Below, you can find some methods used to switch to alert, window, frame


String helpers


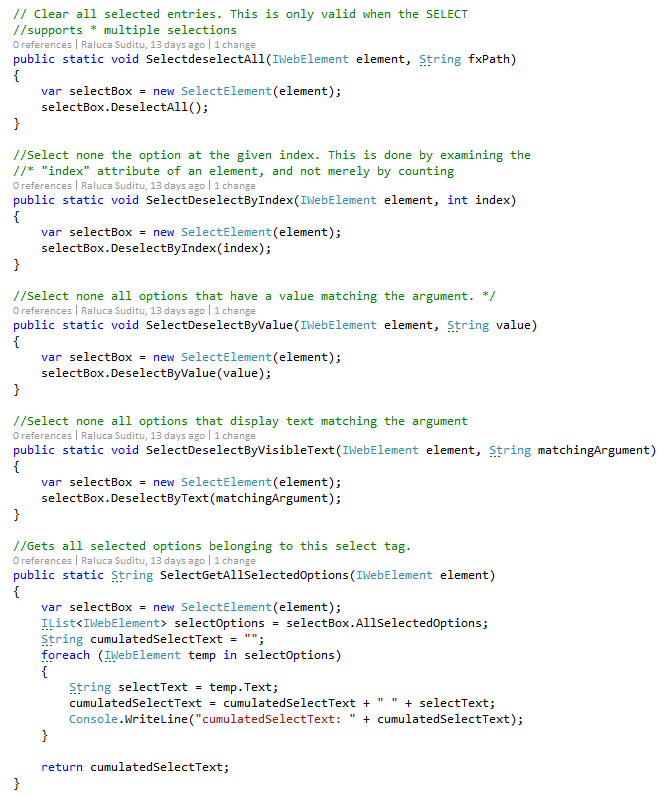
Selection controls

Happy testing and... make it green, becomes a dream :).
For every post I'll recommend something to read. The link for today is: The C# Player's Guide (2nd Edition) .
.
For every post I'll recommend something to read. The link for today is: The C# Player's Guide (2nd Edition)


